Hey Gearspace community,
I wanted to put together a practical breakdown on dealing with low-end mud, boomy bass, and missing punch in home studios and project control rooms.
After building a couple of studio rooms from scratch and wrestling with measurement mics, REW curves, and heavy rockwool panels, I realized how much time most of us spend guessing where to place monitors and traps.
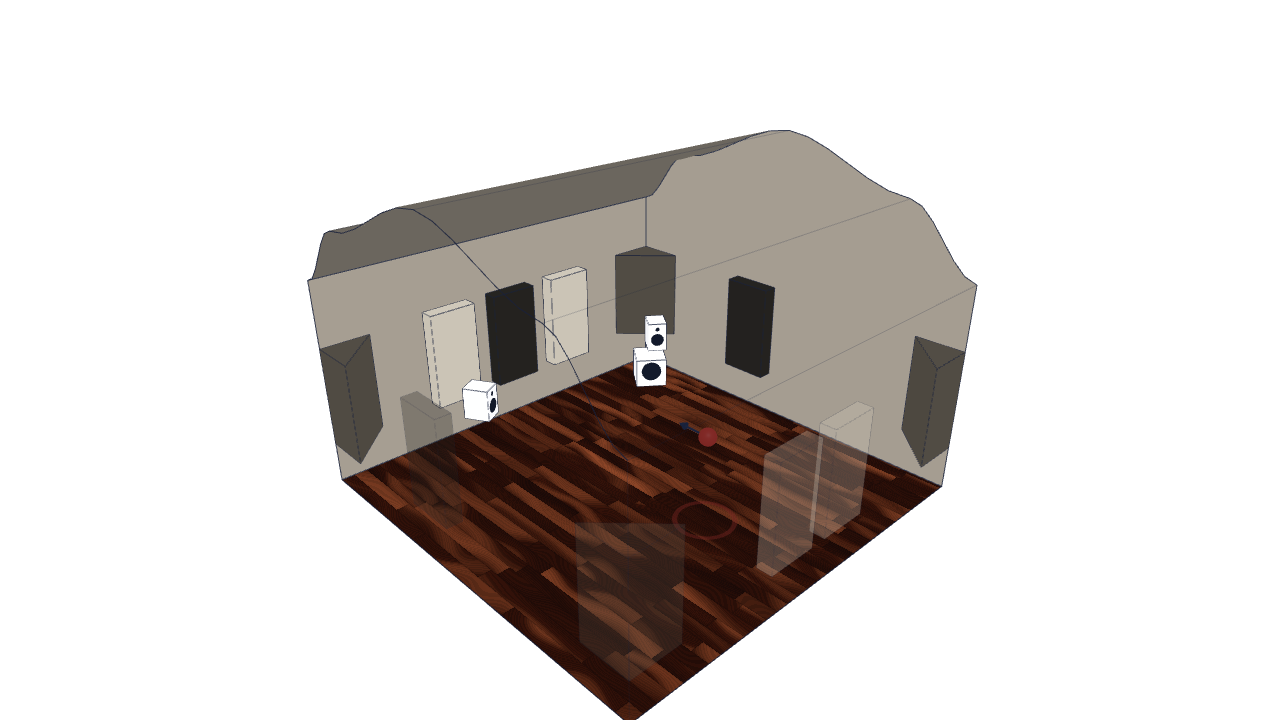
I ended up building a free web-based 3D room simulation tool—roomtreatment.diy—to calculate standing waves and early reflections automatically. But whether you use a computer simulation, a tape measure, or a measurement mic, the underlying physics of fixing your room comes down to three clear steps.
1. Stop Trying to EQ Out SBIR Wall Nulls
The biggest trap in home studio setup is relying entirely on monitor calibration software (Sonarworks, Trinnov, IK ARC) to fix a massive dip in low end.
If your left studio monitor sits away from the front wall, a sound wave travels to the wall, bounces back, and hits your listening position out of phase with the direct sound from the speaker cone. You get a deep cancellation notch—Speaker-Boundary Interference Response (SBIR).
How the SBIR notch forms:
- Sound leaves the studio monitor, travels 1.2 m to the front wall, and reflects back.
- The reflection reaches the engineer's chair out of phase with the direct sound from the monitor.
- The two arrivals cancel: a 15 dB bass notch at 70 Hz.
If your EQ software attempts to boost that dip by , your monitor's amplifier pushes 10 times more power into the woofer cone. But because the reflected wave cancels the direct wave at that exact physical distance, the null remains. You just end up with distorted woofers and headroom clipping.
The Fix:
- Push monitors close to the front wall ( distance from wall to speaker backplate). This pushes the SBIR reflection null up into the mid-frequency range (), where standard wall panels easily absorb it.
- Or move monitors far back ( in larger rooms) so the reflected path delay attenuates the reflection amplitude.
2. Locate Mirror Reflection Points Before Sticking Panels Up
Early specular reflections off side walls and ceilings arrive at your ears within 5 to 15 milliseconds of the direct sound. Your brain struggles to separate the direct audio from the wall bounce, causing:
- Blurred stereo imaging (guitars and panned synths lose precision).
- Mid-frequency comb filtering (vocals sound hollow or phasey).
The Mirror Trick:
Sit in your mix chair and have a friend slide a flat mirror along the side wall at eye height. Wherever you see the reflection of your left or right studio monitor in the mirror, that is your primary reflection point.
Placing a or porous absorber panel centered on that spot cleans up your soundstage instantly. Repeat the mirror trick on the ceiling between your head and the speakers to map out your ceiling cloud.
3. Corner Bass Trapping: Target High-Pressure Zones
Low-frequency room modes accumulate maximum acoustic pressure at rigid wall boundaries, especially where two or three room surfaces meet (dihedral and trihedral corners).
Thin acoustic foam squares do almost nothing below . To tame boomy low end and shorten room decay time ():
- Use dense porous insulation (rigid fiberglass like Owens Corning 703 or mineral wool like Rockwool RW3 / Safe'n'Sound).
- Make absorbers at least to thick, mounted across room corners with an air gap behind the panel. The air gap increases low-frequency efficiency without extra material weight.
Quick Reference: Acoustic Panel Placement Workflow
| Studio Area | Primary Acoustic Problem | Panel Specification | Ideal Mounting Location |
|---|---|---|---|
| Side Wall Mirror Points | Early specular reflections, comb filtering | porous absorber | Eye height, mapped via wall mirror |
| Ceiling Cloud | Vertical desk/ceiling reflections | panel with air gap | Suspended directly above mix chair & desk |
| Room Corners | Low-frequency modal peaks & long decay | thick bass trap | Dihedral corners (wall-to-wall / wall-to-ceiling) |
I Built a Free Tool to Test This in 3D
Instead of spending an afternoon guessing where standing wave pressure builds up in your exact room dimensions, I put together a free browser simulator: roomtreatment.diy.
You can punch in your room dimensions, move your monitors and desk around in 3D, and see real-time standing wave heatmaps and null frequency curves for your setup. It runs right in your web browser, no account or download needed.
Hope this guide is helpful for your studio setups. Would love to hear how you guys handle low-end management in your control rooms!